A while ago, I wanted to do a quick test on a new SQL installation, and I wanted the SQL installation to be on a “pristine” server. I was not keen on creating a new virtual machine on my local dev-box, as for that I would need to create a VM image etc., and it seemed like too much hassle for a lazy person like me. The obvious choice then is to do it in the cloud. How hard can that be, what could possibly go wrong?!
It turned out to not be as straight-forward as I thought it would be, but eventually, I managed to get it right. Since I probably need to do it again some time, I thought I’d write a post about it, so I have something to go back to. So here we go …
Pre-reqs
The assumption is that you have an Azure subscription. If you do not, you can sign up for a free account here.
Create Resource
When we have an account/subscription we log onto the portal:
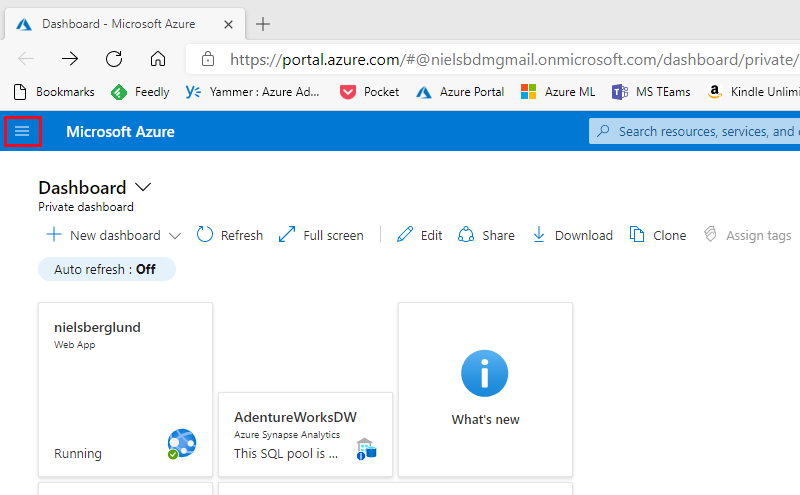
Figure 1: Azure Portal
After we have logged in to the portal, we see something like in Figure 1. To create anything in Azure, we create a new Azure resource. We do that via the Create a resource menu. We click on the “hamburger” menu we see outlined in red in Figure 1 to get to that menu. When clicking on the menu, a list is presented where the first item is Create a resource. Click on that, and we see:
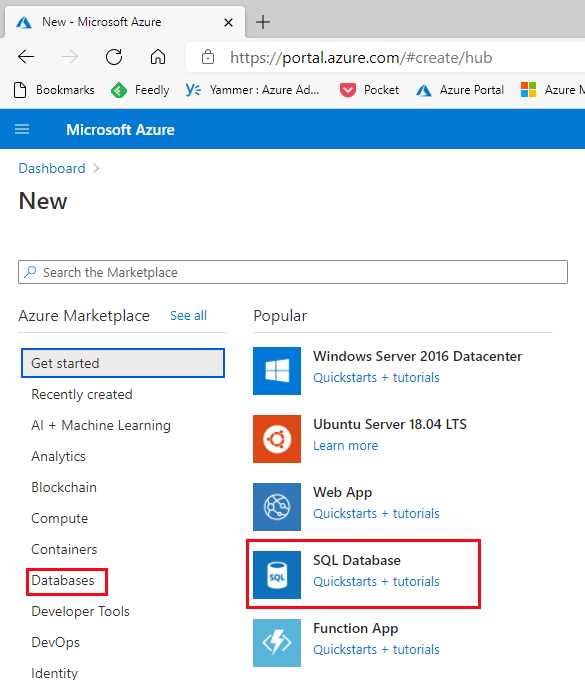
Figure 2: Create Resource
Looking at Figure 2, I do not see anything that really stands out. Sure, we see some items outlined in red in the figure that relates to data and databases. However, when we “drill down” into those items there is nothing there that refers explicitly to SQL installations on a VM, it is all more related to managed databases.
I guess we could go into the Compute item and deploy a VM. Having done that, we upload the SQL Server install media and do a manual installation of SQL Server on the VM. However, I don’t see that being much better than doing it on a VM on my local machine, and I thought there has to be something better.
Azure SQL
After extensive “research”, (read Google:ing), I found something that might help:
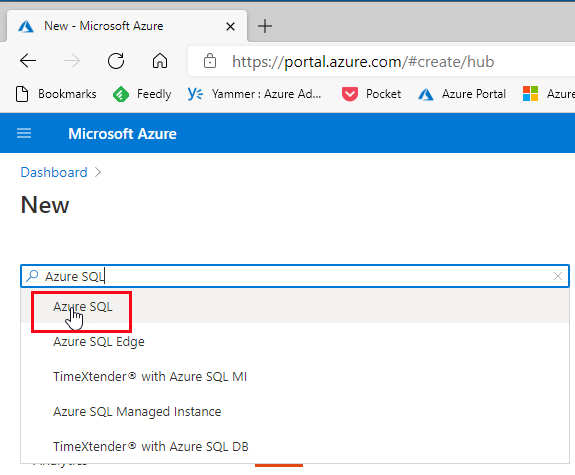
Figure 3: Azure SQL - I
If I enter Azure SQL, in the Search the Marketplace search-box a drop-down list pops up, (or should it be down), and in the list is an entry for Azure SQL as outlined in red in Figure 3. Clicking on that we get something like so:
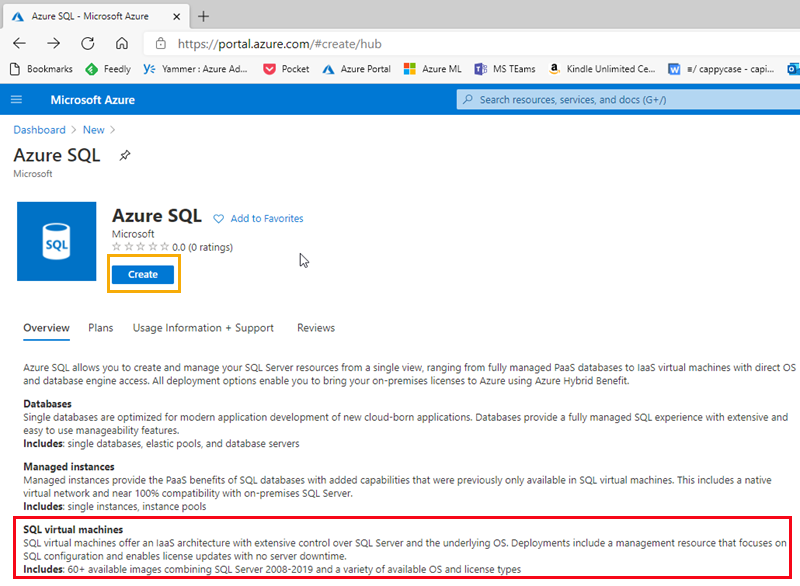
Figure 4: Azure SQL - II
In Figure 4, we see how we can create and manage SQL Server resources, including SQL Server virtual machines, (outlined in red).
So let us click on the Create button which in Figure 4 is outlined in yellow:
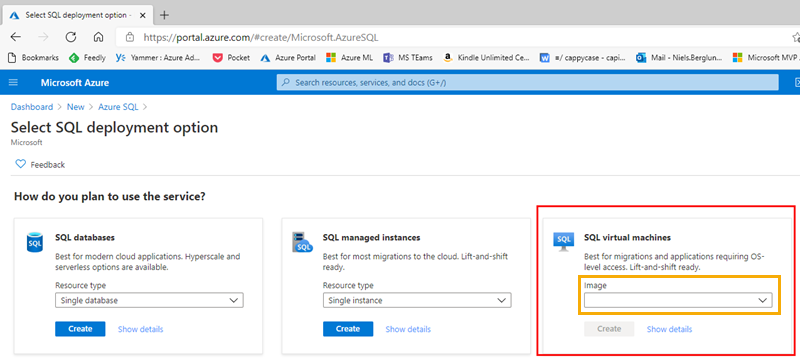
Figure 5: SQL Deployment Option
After clicking on the Create button, we see a form as in Figure 5, where we have some choices. We are interested in the SQL virtual machine option which is outlined in red. When we click on the drop-down list-box outlined in yellow, we get a list as so:
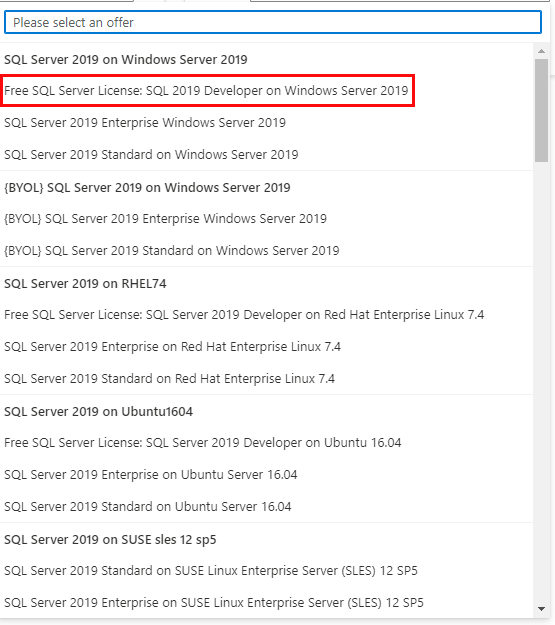
Figure 6: SQL & OS Versions
The list in Figure 6 shows us some of the various SQL Server and operating system versions we can deploy. We see, outlined in red that we want to deploy SQL Server 2019 Developer Edition on Windows Server 2019.
NOTE: I should have mentioned this in the pre-reqs above; you have to have licenses for the OS and SQL edition you choose.
We choose the version we want to use and click on the Create button.
Create VM
After clicking the Create button we see:
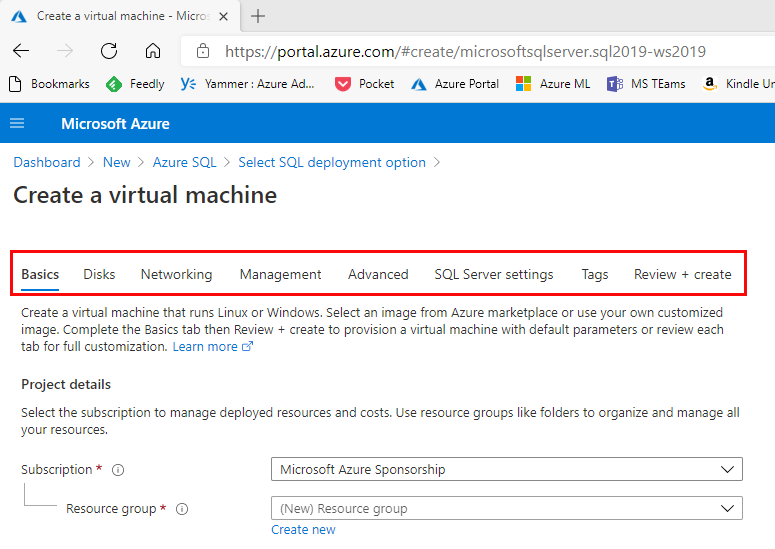
Figure 7: Create a VM
In Figure 7 we see the top part of the Create a virtual machine page. We see, outlined in red, the “tabs” for setting up different aspects of the VM.
Basics
We start at the Basics tab and, as the name implies, here we set the base settings for the VM:
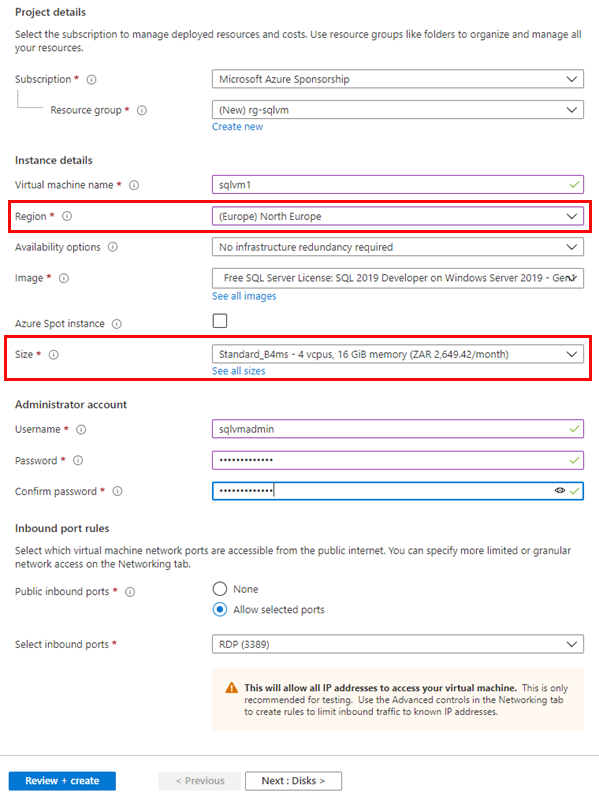
Figure 8: Basic VM Details
What Figure 8 shows is the main part of the Basics tab. We see how I have filled in the various details for my VM:
- the subscription I want to use.
- what resource group the VM should be placed in. In this case, I have decided to create a new resource group for the VM:
rg-sqlvm. - name of the VM.
- the SQL Server image is defaulted to what you chose from the list in Figure 6, but you can change it.
- the region where you want the VM to be located.
- size of the VM.
- various account information
I have outlined Region and Size in Figure 8 because you may get a different price for your VM depending on the region. So if you just want to do a quick test, choose a region with low price.
Having filled in all necessary information, you can now go ahead and click on the Review + create button in the lower left-hand corner in Figure 8. If you were to do that your VM and SQL installation would be created with default settings and the information you entered under the Basics tab.
In my case, I wanted to configure the VM and SQL installation somewhat, and what I wanted to customise was:
- Disks
- SQL Server settings
So, let us move on to Disks.
Disks
I want to customise disks settings because the VM installation uses somewhat expensive Premium SSD disks by default. Since this is just an installation for “quick and dirty” tests, I want to change to not use the default disks. I click on the Disks tab:
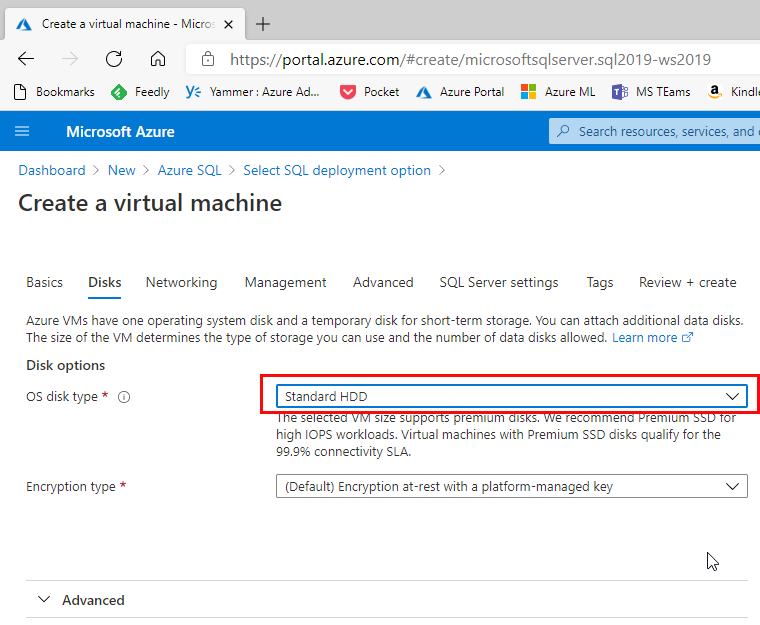
Figure 9: Disks
We see in Figure 9 how I have chosen Standard HDD as disk type form my VM. That is the only thing I change related to disks for my installation, and I now go on to SQL settings.
SQL Server Settings
There are a couple of things I want to change related to SQL Settings:
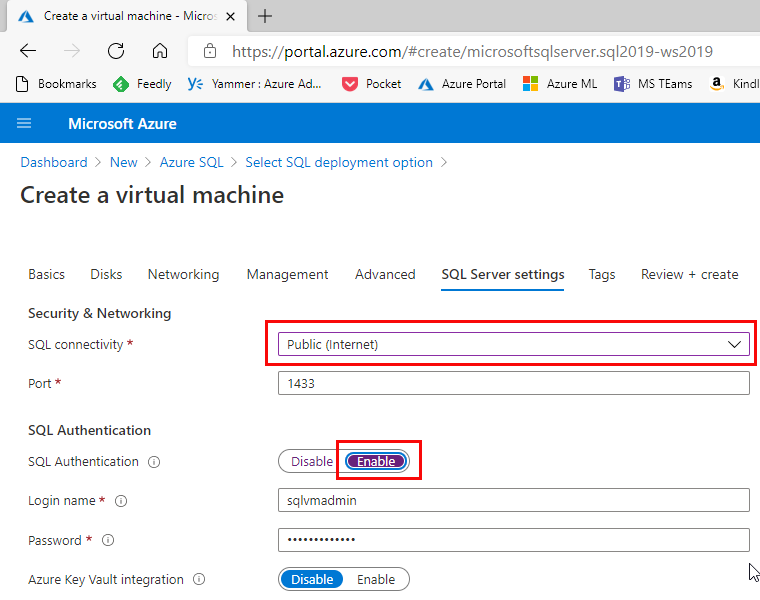
Figure 10: SQL Server Settings - I
In Figure 10, outlined in red, we see some of the settings I want to change:
- I change the networking to be Public to connect directly to SQL Server over port 1433.
- I enable SQL authentication. The login name and password default to what you set up for the VM.
There is one more SQL setting I want to change:
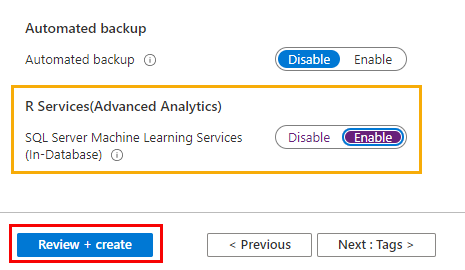
Figure 11: SQL Server Settings - II
Since I am doing some SQL Server Machine Learning Services, we see in Figure 11 how I have enabled it.
There is nothing more I want to change, so I click the Review + create button outlined in red in Figure 11.
Review & Create
When I click the Review + create button, I am presented with the VM and SQL Server settings. When I am happy with the settings I click Create:
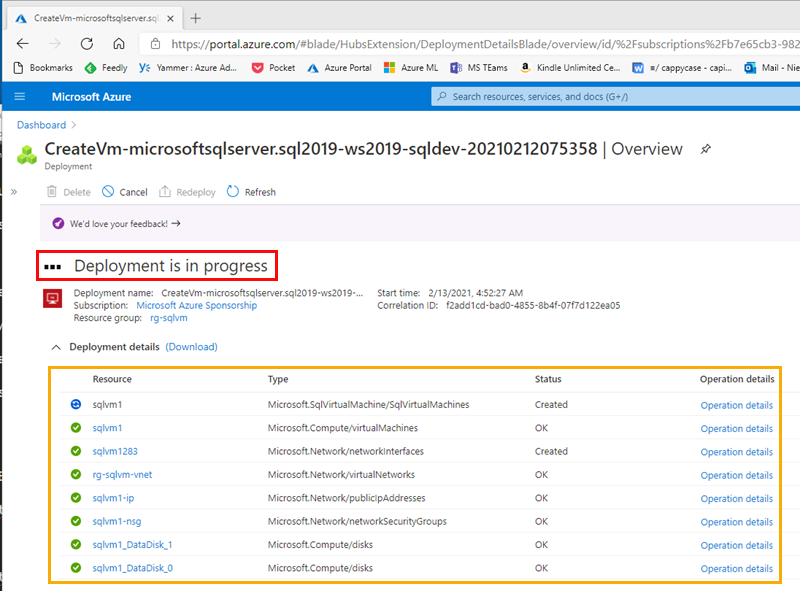
Figure 12: Create VM - I
In Figure 12 we see how the deployment has started, and - outlined in yellow - we see the various components being deployed and the state of the deployment. After a while we see something like so:
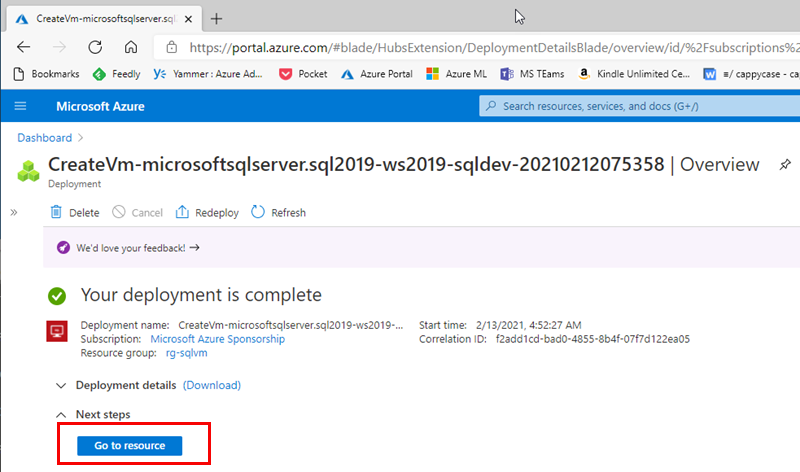
Figure 13: Create VM - II
The deployment has finished as we see in Figure 13, and we can click the Go to resource button:
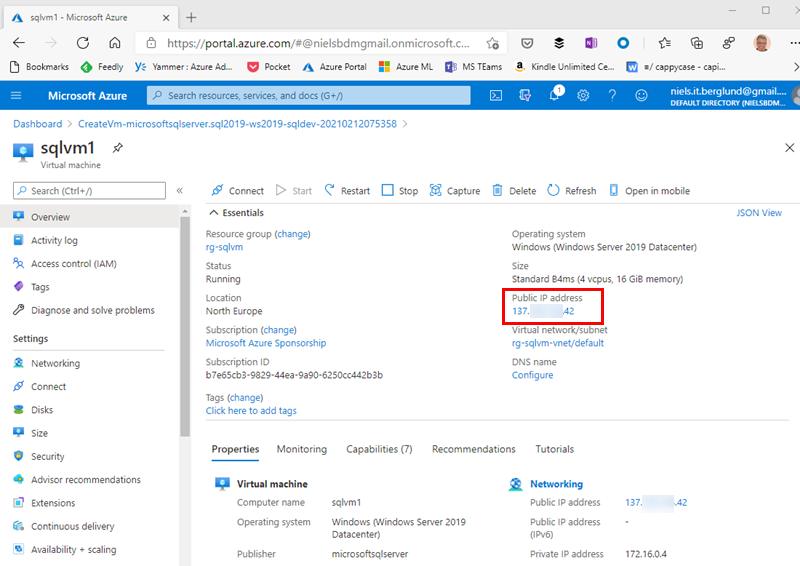
Figure 14: Deployed Resource
Clicking the button takes us to the VM and shows information about the VM as we see in Figure 14. What interests us is what we see outlined in red - the public IP address.
Connecting to SQL Server
Having the address, we can connect to the SQL Server. My tool of choice for connecting to SQL is Azure Data Studio, (ADS):
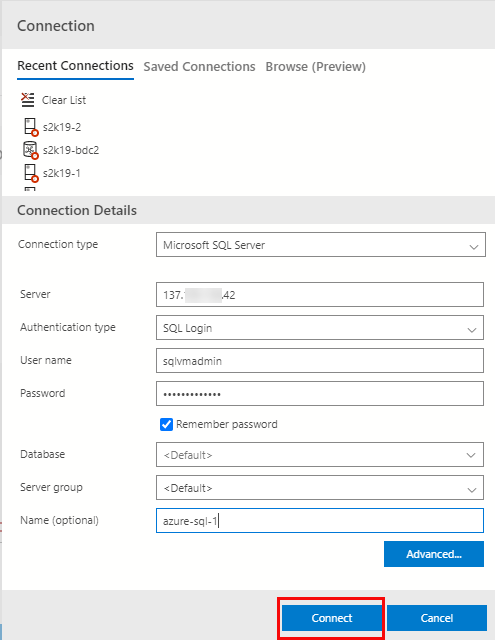
Figure 15: Connection Dialog
To connect I enter the connection details in the ADS Connection dialog as in Figure 15, and then I click Connect, (outlined in red):
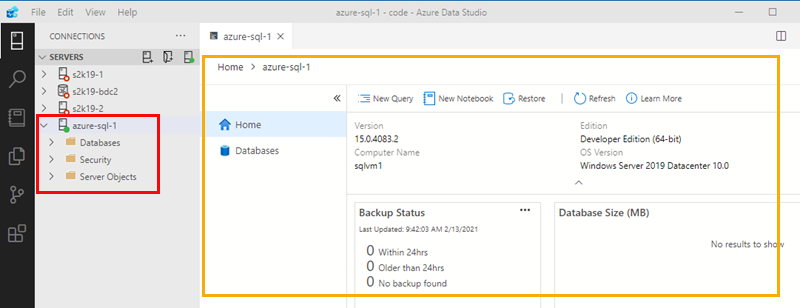
Figure 16: SQL Server Overview
After I have connected I see in the Server Explorer my new instance, (outlined in red), and an overview of the installed instance, (outlined in yellow).
I can now go ahead and create databases, running queries, etc. like I would do on an on-prem SQL Server!
Summary
To summarise:
- Log in to the Azure Portal.
- Add a new Azure SQL resource.
- Choose the SQL virtual machine deployment option.
- Enter the settings for the VM and the SQL Server instance.
- Deploy the VM and SQL Server.
~ Finally
If you have comments, questions etc., please comment on this post or ping me.