By the time I publish this blog post MS Ignite is over. During Ignite, Microsoft announced quite a few new things, amongst them SQL Server 2019 with a whole lot of new features and functionality.
I touched briefly on some of them in my What is New in SQL Server 2019 Public Preview post. A couple of things that caught my eye were that SQL Server 2019 for Linux now supports In-Database analytics, what we know as SQL Server Machine Learning Services (R and Python), as well as the Java language extension.
NOTE: You may ask yourself what the Java language extension is; well, that is the ability to access Java code from T-SQL. It is a little bit like SQLCLR, but it executes outside of the SQL Server memory and process space.
Seeing that I never really have played around with SQL Server for Linux, mostly due to that in previous versions (2017) it did not have support for In-Database analytics, I thought that now would be a good time to have a look.
Cool, so install SQL Server 2019 for Linux and start to play around! Hmm, what do I install it on - I am a Windows guy, this whole Linux thing is “scary”. Ok, I guess I could spin up a virtual machine and install it there, but I am lazy. Create a VM, and then install SQL Server seemed like too much work.
Then I thought about my mate and colleague Charl Lamprecht, a.k.a The Donut Maker, and how he raves about Docker. So maybe I should run SQL Server 2019 for Linux in a container, problem solved. Uh, maybe not; you see - I have never used Docker. I am an old guy (some would even call me a “Grumpy Old Man”, a GOM), and you know the saying about old dogs and new tricks.
So anyway, I decided to give it a go; how hard can it be (it turns out not hard at all), and this post is about the steps I took to get SQL Server 2019 for Linux running in Docker on Windows.
Docker for Windows
This post does not cover how to download and install Docker for Windows, as there are lots of posts out there about it. If you want somewhere to start; Get started with Docker for Windows is an excellent starting point.
I do, however, want to point out a couple of things, that caught me out:
- Hyper-V needs to be enabled on your host computer. This means you cannot run Virtual Box VM’s at the same time.
- When you install Docker, you decide whether you want to run Linux or Windows containers. So, if you install Docker for Windows intending to run SQL Server 2019 for Linux, you choose Linux containers.
You can change the choice between Linux and Windows containers from the Docker icon in the system tray (right click on the icon):
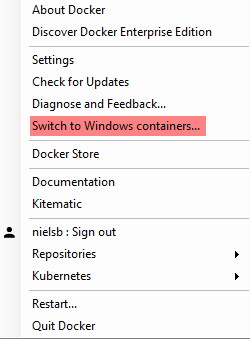
Figure 1: Change Container Type
In Figure 1 we see the menu entry to change the Docker container type to Windows. To change container type works the other way around as well; changing from Windows to Linux.
Docker Basics
Before we look at how to get and install the SQL Server “stuff” let us discuss some basics, and let us start with some vocabulary:
- Layer: a set of read-only files or commands that describe how to set up the underlying system beneath the container
- Image: this is the piece of “something”, in our case SQL Server 2019 for Linux, that you want to install. The image consists of one or more layers.
- Container: you download an image and create a container, and this is what you interact with.
- Registry: where images are stored and delivered from.
In our case we:
- Connect to a registry which contains a SQL Server 2019 for Linux image.
- We download the image and create a container.
- We “run” the container and interact with SQL Server.
The interaction with Docker (download image, create a container, etc.) is via CLI (Command Line Interface), using the docker base command followed by child commands and options/parameters (docker childcommand). Examples of child commands:
login: logs in to a Docker registry.pull: retrieve an image from a registry.images: returns a list of images on the machine.run: creates a new container from an image and starts it. If the image has not beenpull:ed yet, it also pulls the image.ps: Lists containers.exec: executes a command in a container. For example, you want to run a command shell in the container.stop: stops a running container.start: starts up an existing stopped container.rm: removes a container.
To see a full list of commands you can go here.
As I mentioned above, we interact with Docker via the command line, and when you are on Windows, you most likely use Powershell. In this post I do it somewhat differently in that I do not use the actual Powershell shell, but instead Azure Data Studio.
Azure Data Studio
What is Azure Data Studio then? Well, it is the evolution of SQL Operations Studio. The blog post Azure Data Studio for SQL Server, introduces it like so:
Azure Data Studio is a new cross-platform desktop environment for data professionals using the family of on-premises and cloud data platforms on Windows, MacOS, and Linux. Previously released under the preview name SQL Operations Studio, Azure Data Studio offers a modern editor experience with lightning fast IntelliSense, code snippets, source control integration, and an integrated terminal. It is engineered with the data platform user in mind, with built-in charting of query resultsets and customizable dashboards.
We can think what we want about the “blurb” above, but ADS does have some interesting features, and for the Docker CLI work we use the integrated terminal:
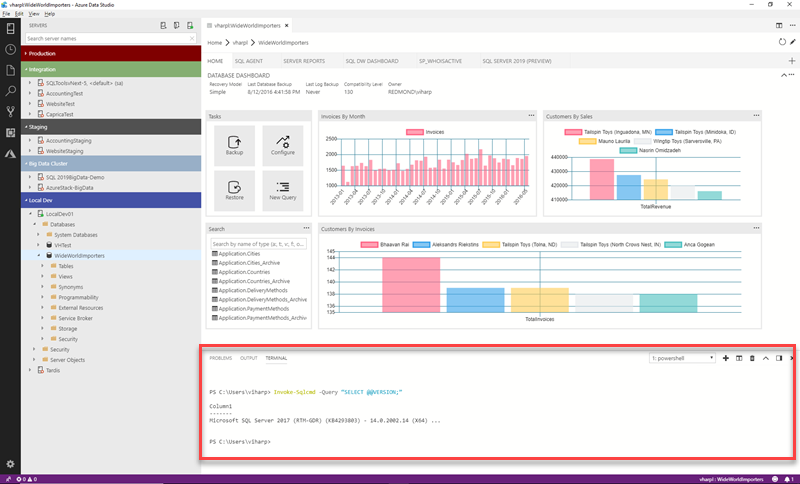
Figure 2: Azure Data Studio and Integrated Terminal
What we see in Figure 2 is ADS with visualised resultsets, some dashboards and - outlined in red - the integrated terminal. Now, let us get down to business.
Getting the SQL Server 2019 for Linux Image
We get the SQL Server 2019 for Linux Docker image from the Microsoft Container Registry (MCR). MCR acts as a single download source for Microsoft’s container images. Regardless of where customers discover Microsoft images, the pull source is mcr.microsoft.com.
To get the image I open Azure Data Studio:
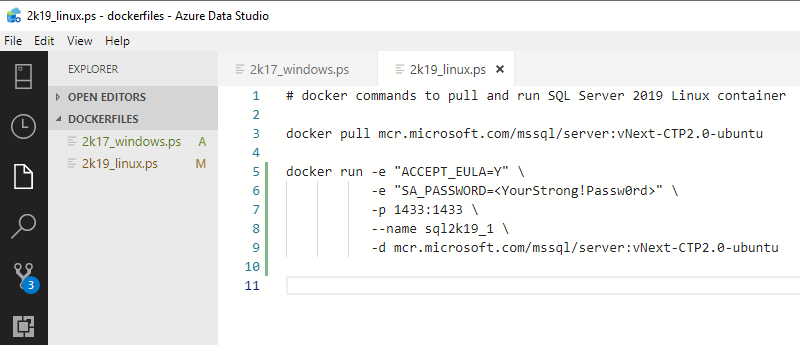
Figure 3: Docker Helper Files
We see in Figure 3 how I have the 2k19_linux.ps file open in the ADS editor, and how that file contains some Docker commands. I open the integrated terminal in ADS through Ctrl + `, or by using the menu: “View | Command Palette | View: Toggle Integrated Terminal”:
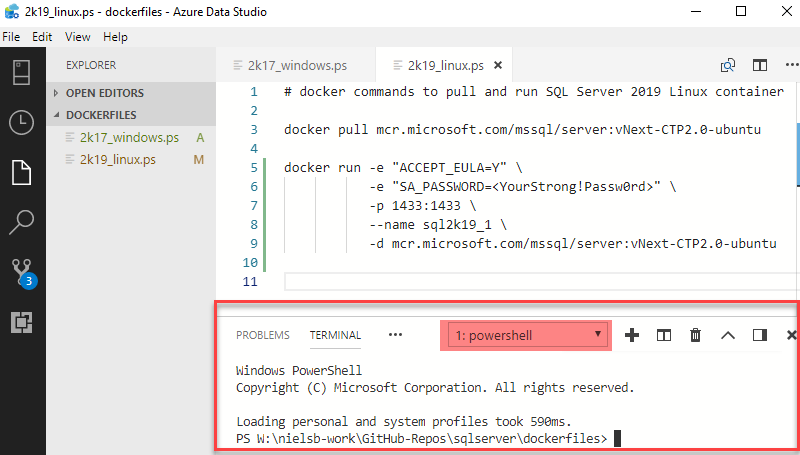
Figure 4: Integrated Terminal
In Figure 4 we see how the terminal is open (outlined in red) and it is the Powershell terminal (highlighted in red).
NOTE: The reason I use ADS is that I wanted to see what I can do with it, I could as easily have used the Powershell shell.
Let us now get the SQL Server 2019 image, and I do it by copying the docker pull ...command from the file to the terminal and hit enter. In the terminal you now see something like so (output edited for readability):
|
|
Code Snippet 1: Doing a Pull
We see in Code Snippet 1 how Docker retrieves the image. In fact, it retrieves the layers the image consists of. The layers are identified by the b234f539f7a1, 55172d420b43, and so forth as we see in Code Snippet 1. Eventually, the pull finishes, and we see in the terminal:
|
|
Code Snippet 2: Pull Finished
After the pull command has finished, we can check what images we have by executing docker images. When I do it on my machine I see this:
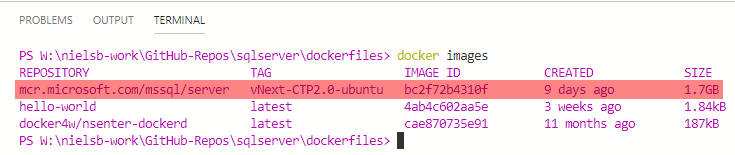
Figure 5: Pulled Docker Images
We see from Figure 5 how the SQL Server image now exists on the machine.
Creating a Container
Cool, we have an image. However, an image is just that, an image, and you cannot interact with it. To relate it to SQL Server, think about the image as an .iso install file. We need to “install” the image, e.g. create and run a container. For this we use the second docker command from Figure 3 above, and it looks like so:
|
|
Code Snippet 3: Create & Run a Container
In Code Snippet 3 we see how we use the docker run command to create the container. Let us look at the options:
-e "ACCEPT_EULA=Y": As creating the container also installs SQL Server, we need to accept the SQL Server EULA. The-eoption (also--env) sets environment variables. In this case, environment variables SQL Server requires.-e "SA_PASSWORD=<Strong!Passw0rd>": A second environment variable. When running SQL Server in a container, you need to set a password which follows the SQL Server default password policy. Otherwise, the container can not setup SQL server and will stop working. By default, the password must be at least 8 characters long and contain characters from three of the following four sets: Uppercase letters, Lowercase letters, Base 10 digits, and Symbols.-p 1433:1433: The-p(or--expose) option binds a port on the host machine (to the left of the colon) to a port on the container. If you run multiple SQL Server containers, the SQL Server container uses port 1433 by default, and you should use different port numbers for the host machine:-p 1401:1433for example.--name sql2k19_1: The--nameoption assigns a name to the container. This is like a SQL Server instance name.-d mcr.microsoft.com/mssql/server:vNext-CTP2.0-ubuntu: This indicates which image to create a container from. The-doption tells Docker we want to run the container detached from the calling process. In other words, it is still up and running after you close the terminal.
NOTE: I mentioned above about the
-poption that if you run multiple instances you should have different host ports. This is also true if you run a non Docker SQL Server instance on you machine.
After we execute the code in Code Snippet 3 we can check that we have a new container: docker ps:

Figure 6: Docker Container
From what we see in Figure 6, it looks like we are in business! If we want to we can connect into the container and, for example, run a bash shell:
|
|
Code Snippet 4: Run bash Shell in the Container
That is all well and good, but what about SQL Server?
Test the Container
Right, so now we have a container, and that container hopefully runs SQL Server. Let us try and connect to the SQL Server via ADS.
So I switch from the Explorer view to Servers: Ctrl + G, and I click New Connection:
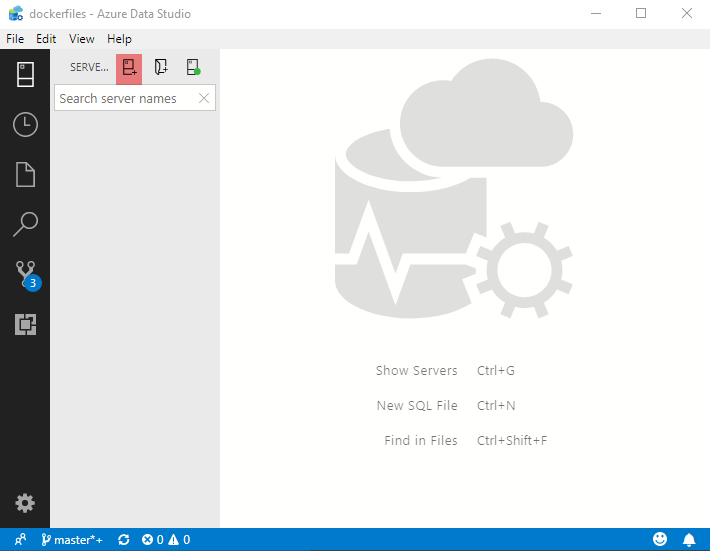
Figure 7: New Connection
The New Connection is what is highlighted in red in Figure 7, and clicking it I get a connection dialog:
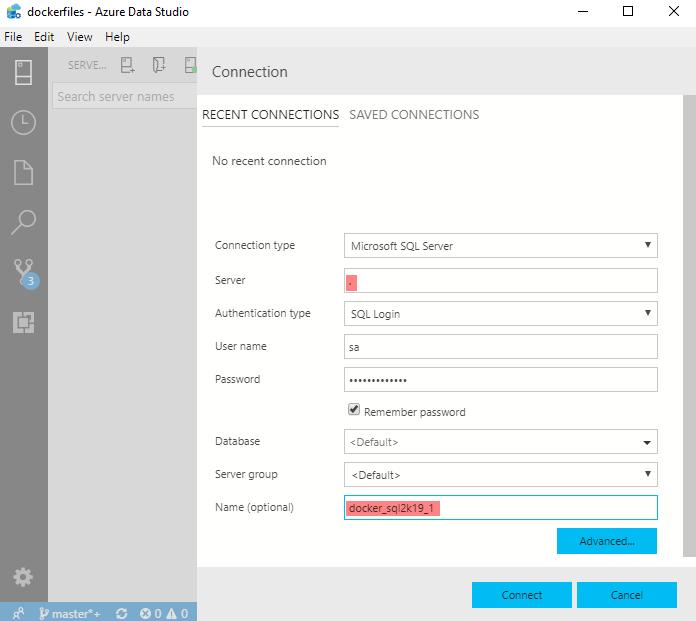
Figure 8: New Connection
In the connection dialog we see, in Figure 8, how I want to connect to localhost (the highlighted “.” in the Server text box), the password is whatever password I set in Code Snippet 3, and I chose to give the connection a name (the highlighted part in the Name text box). So if everything works, when I click on Connect I should see something like so:
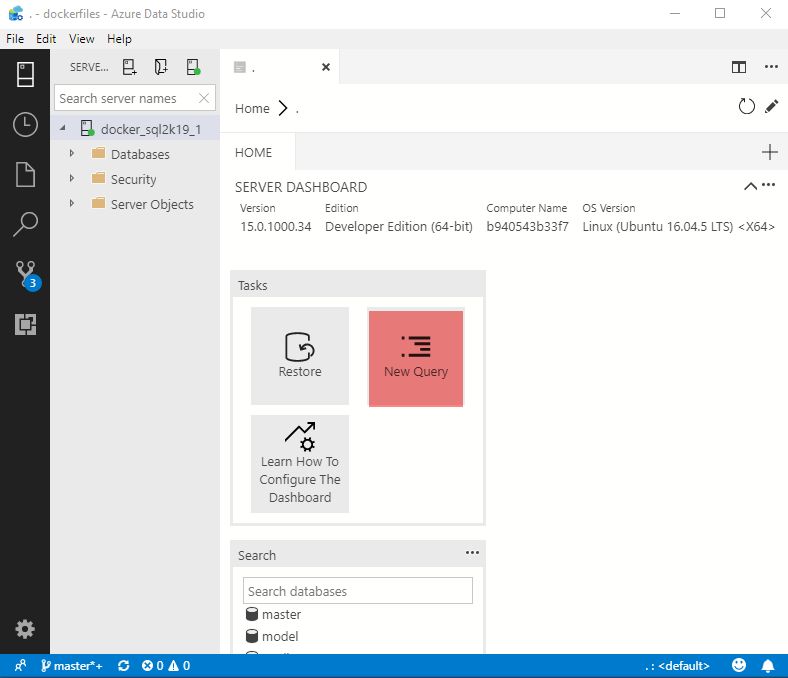
Figure 9: Successful Connection
As we see in Figure 9 everything worked, and I am now connected to SQL Server 2019 for Linux, running in Docker container! To further prove all works I click on the “New Query” button (highlighted in red), and I execute a trivial SELECT statement: SELECT * FROM sys.databases:
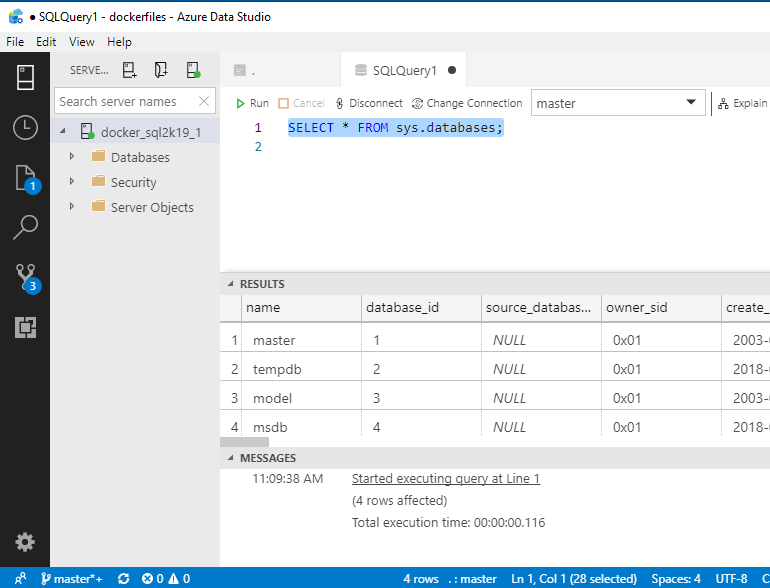
Figure 10: Result from Select
In Figure 10 we see how we get the result back! We can now continue working with SQL Server 2019 for Linux. If you for some reason want to shut down the container you run docker stop <containername> , and to start it up again - surprise, surprise - docker start <containername>.
Summary
In this post we covered how we can run SQL Server 2019 for Linux in a Docker container on our Windows machine. We mentioned the Docker commands to use:
docker pulldocker rundocker imagesdocker psdocker stopdocker start
We mentioned how we map a port on the hosting machine to a port on the container, and how we should use different host ports when we have multiple SQL Server instances. The SQL Server in the container is by default using port 1433.
In the post I also spoke about Azure Data Studio and some of its new functionality.
In future blog posts I will talk more about SQL Server 2019 for Linux, especially the In-Database analytics and the Java extensions, as well as Azure Data Studio.
~ Finally
If you have comments, questions etc., please comment on this post or ping me.