As you may know, I am working on a blog-post series, Develop a Real-Time Leaderboard Using Kafka and Azure Data Explorer. As the title implies, Kafka ingests data into Azure Data Explorer (ADX). This is done using the Azure Data Explorer Kusto Sink connector, where the connector runs in a JVM process in Kafka Connect. All this run in Docker containers.
While writing (still writing) the fourth post in the series, I realised I had to create my own image for Kafka Connect and the Kusto Sink connector. You will find an explanation as to why below. Since I have partly gone over to the “dark side” (using Apple Silicon, ARM64), I thought it’d be nice if the image I created targeted both AMD64 and ARM64. I.e. I wanted to create a multi-platform image. In my usual style, I thought: “How hard can it be? What could possibly go wrong” 😄.
Well, it was a tad more difficult than I imagined, and in this post, I cover the steps I took to create my Kafka Connect and Kusto Sink connector image as a multi-platform Docker image. Oh, and if you are not interested in the Kusto Sink connector and Kafka Connect at all (you should be 😄), don’t worry. The steps covered here work for any Docker Image you want to create as a multi-platform image.
Pre-Reqs (if you want to follow along)
The pre-reqs for this post are the same as in the Develop a Real-Time Leaderboard Using Kafka and Azure Data Explorer - I post. When referring to that post later, I call it Leaderboard - I.
You should further have a working ADX cluster as per the post mentioned above:
- The ADX cluster is enabled for streaming.
- You have a database and a table. In my case,
leaderboardandgameplay. - Either the database or the table is enabled for streaming ingestion (both are also fine).
- You have created an Azure Service Principal and added it as admin to the database.
- You have a JSON ingestion mapping for your table, mapping Kafka event fields to columns in the table.
- You have the URLs for querying and ingesting into ADX.
Code
All the required code (including the setup of ADX) is in the kafkaconn-kustosink GitHub repo. Clone the repo to somewhere on your machine, and you are good to go.
DISCLAIMER
I better say this up-front: I am a Docker newbie, so there may be other ways of doing this. But, as they say, it works on my machine(s) 😄.
But, seriously, if you know of better ways to do this - please let me know.
Multi Platform Docker Images
Docker has revolutionised the way we package and deploy software applications. With its containerisation technology, we can create lightweight, portable, and self-contained environments that can run on any platform, from laptops to data centres, without compatibility issues. However, as more and more architectures and operating systems are emerging, it’s becoming increasingly challenging to maintain a single image that can work across all of them. That’s where multi-platform Docker images come in.
Multi-platform Docker images allow you to build and distribute a single image that can run on different architectures and operating systems without any modifications. This approach simplifies the deployment process and ensures consistency and compatibility across different platforms.
Background
Above, I mentioned that I had to build my own Docker image containing Kafka Connect and the Kusto Sink connector. In the Leaderboard - post, I loaded the Kusto Sink connector from Confluent Hub, and all was good. When writing the fourth post, this did not work anymore - I got an error that the connector couldn’t be found (or something to that extent). I realised I had to build my own Kafka Connect and Kusto Sink Connector image. Once again: “How hard can it be? What could possibly go wrong”.
Dockerfile
So to build my image, I downloaded the latest version of the Kusto Sink connector from
here. I then created the Dockerfile:
|
|
Code Snippet 1: Docker File
What you see in Code Snippet 1 is straight forward:
- I use the base image of Kafka Connect.
- I set an environment variable to override whatever policies I need (if any).
- I copy the Kusto
.jarfile to a “well-known” folder in the Connect container.
The downloaded connector and the Dockerfile file are in the kustosink-image folder in the repo.
Build
Having created the Dockerfile, you can now build the image:
|
|
Code Snippet 2: Docker Build
You see in Code Snippet 2 how I prefix the image with my Dockerhub username as I later will push it to Dockerhub. I also tag it with latest. To see that your image has been created, you run docker images:

Figure 1: Created Image
Cool, as shown in Figure 1, the image has been created. If you want, you can now test it.
Test
To ensure your connector image loads up correctly, you spin up your Docker containers using the docker-compose.yml file in the docker folder in the repo. The only difference between the docker-compose.yml here and the one in the
Leaderboard - I post is the connect container:
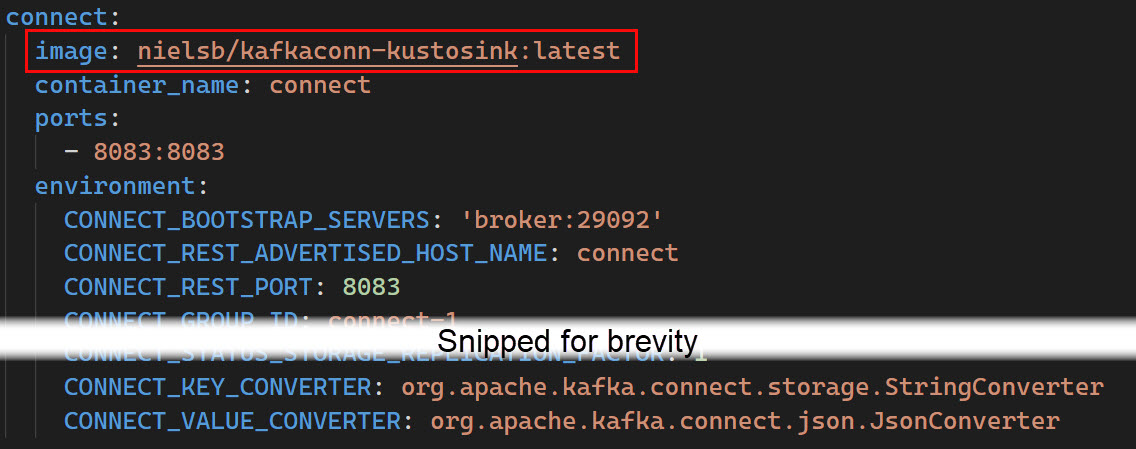
Figure 2: Connect Container
In the
Leaderboard - I post, I directly used the Confluent image cp-server-connect-base:latest and loaded the Kusto connector from Confluent Hub. As you see in Figure 2, here I reference my image instead, and I do not load anything from Confluent Hub.
You can now use Postman (or curl) as in the
Leaderboard - I post to check that the connector has been loaded:
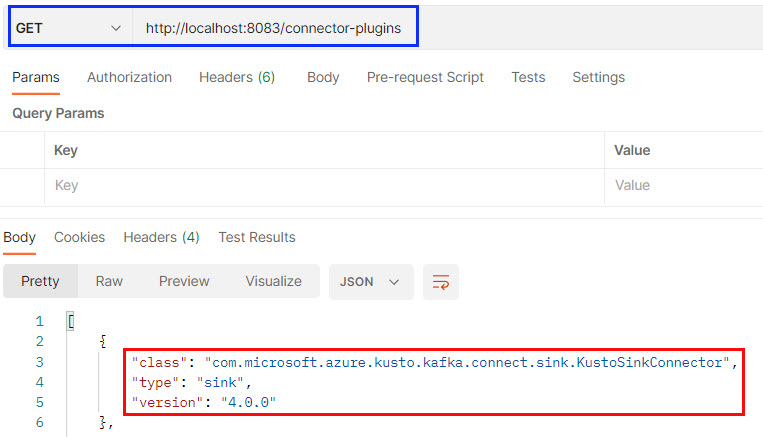
Figure 3: Kusto Sink Connector Loaded
Yay, it worked! In Figure 3, you see (outlined in blue) how you execute a GET against http://localhost:8083/connector-plugins, and the Kusto Sink connector is returned as being loaded (outlined in red).
If you want, you can go on and configure the connector to ingest into your table using the Python app as in Leaderboard - I. I do, however, leave that up to you.
Docker Hub
Having built the image and confirmed it is working, you now push it to your Docker Hub image repo: docker push <your-name>/kafkaconn-kustosink:latest. After I have done that, and I browse to the kafkaconn-kustosink repo and click on the Tags tab, I see something like so:
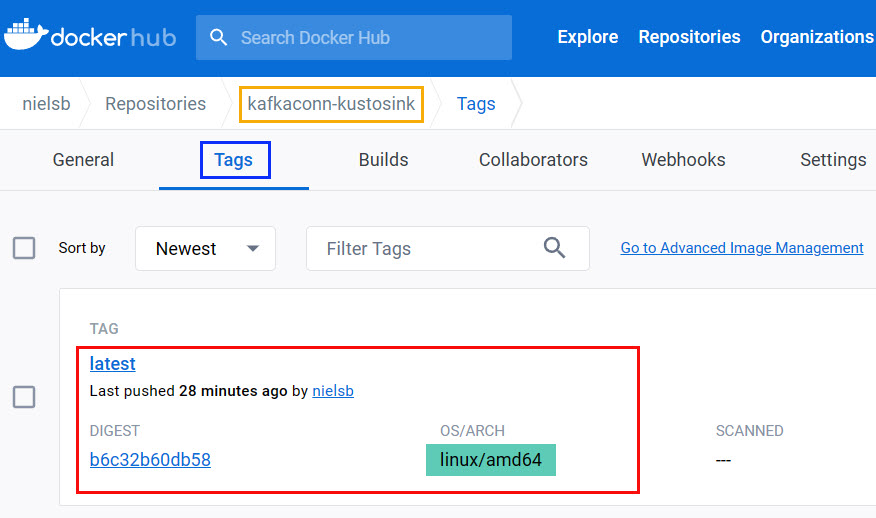
Figure 4: Kusto Connector Repo
What is highlighted in green within the red outline is why this post came about. As I built the image on an Intel machine, it is expected to see that the platform is AMD64. What about if I want to run it on my MacBook Pro (M1)?
Build for Different Platforms - I
If I want an image that can be run on an ARM64 machine, I could build it on the machine in question. That is a bit cumbersome, so I want to build on my Intel box.
Looking at the
docker build options, I see a --platform option, where the description says: Set platform if server is multi-platform capable. That sounds interesting; let’s try the following:
|
|
Code Snippet 3: Build and Push
No errors when you execute the code in Code Snippet 3 (remember to change nielsb to what your Docker user name is). However, when you browse to your repo as you did in Figure 4 you see:
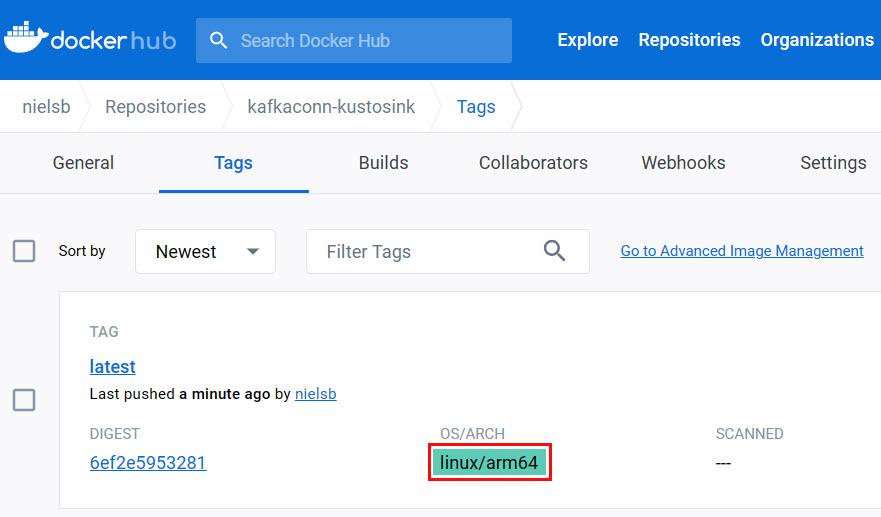
Figure 5: Kusto Connector Repo - II
Hmm, only one tag in Figure 5? I expected to see two, one for AMD64 and one for ARM64. And notice how the AMD64 tag has been overwritten. Not good!
NOTE: Above I wrote I could build the ARM64 image on my MacBook. Sure, that works, but it will behave like the above. As soon as I push it to my repo, whatever is there is overwritten.
You can tag the images differently so they contain the platform information. That works, but now you need different compose files for different architectures, which is “lame” 😄.
Build for Different Platforms - II
To solve the problem above, Docker Buildx comes to help. So what is Docker Buildx? From Overview of Docker Build:
The new client Docker Buildx is a CLI plugin that extends the docker command with the full support of the features provided by BuildKit builder toolkit. docker buildx build command provides the same user experience as docker build with many new features.
Part of the new features is the ability to build and push simultaneously, as well as building multi-platform images in one go.
buildx
To build multi-platform images, you theoretically do something like so:
|
|
Code Snippet 4: Buildx Build and Push
Notice how I above said theoretically. The reason is that when you run the code in Code Snippet 4, you get an error:

Figure 6: Driver Error
When you build (docker buildx/docker build), the build uses a builder. The builder uses a driver, and the default builder/driver does not allow a multi-platform build, as the error in Figure 6 tells you.
Builders & Drivers
To see what builders and drivers you have, run docker buildx ls:

Figure 7: Builders & Drivers
When building through Docker Desktop, the driver is the default docker driver, which you see in Figure 7. The driver supports building for multiple platforms but not for multiple platforms simultaneously. For that, you need a builder using the docker-container driver.
The way to get the docker-container driver is by creating a new “builder”:
|
|
Code Snippet 5: Creating New Builder
The code in Code Snippet 5 creates a new builder called mybuilder, using the docker-container driver. You now have a new builder, but it is not “enabled” yet. To use it when building, you do: docker buildx use mybuilder.
After switching to your builder, you can now run the code in Code Snippet 4. Beware that the first run can take a while. On my machine, it completed in around 5 minutes.
When I now browse to my repo as in Figure 4, I see:
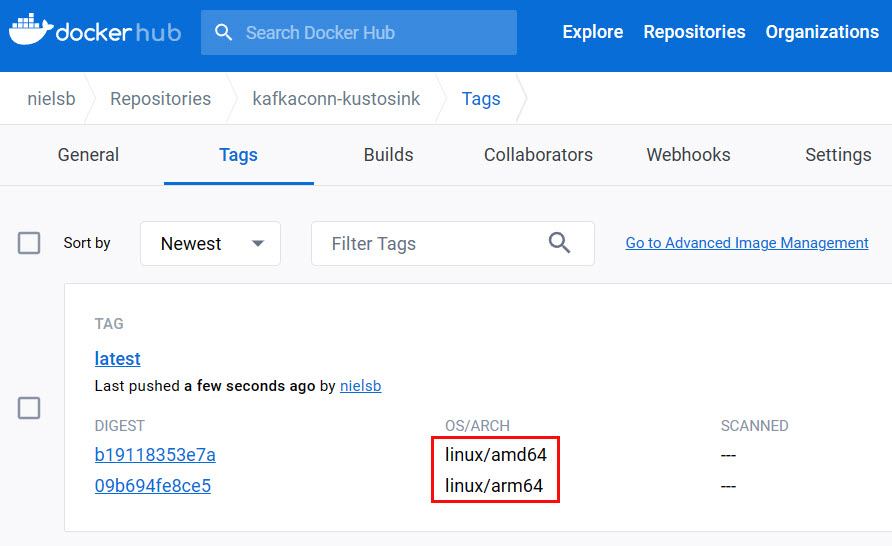
Figure 8: Multi Platform Images
Whohoo, success, as Figure 8 now shows images supporting both AMD64 and ARM64!
Summary
In the beginning of this post I said I’d cover the steps I did to build and deploy multi-platform Docker images.
Here’s what to do:
- You use the Docker Buildx CLI plugin (
docker buildx). - You create a new builder based on the
docker-containerdriver (docker buildx create --name mybuilder --driver docker-container --bootstrap. - You switch to that builder (
docker buildx use mybuilder).
Having done the above, you can now create and push a multi-platform image:
|
|
Code Snippet 6: Buildx Build and Push
There you have it! Oh, and as I said in the beginning - this is not specific to the Kusto Sink Connector. You follow the same steps for any image you want to create.
Kusto Sink Connector @ Docker Hub
Since I am partial to the Kusto Sink Connector I will try and keep AMD64 and ARM64 images up-to-date at my public
kafkaconn-kustosink repo.
~ Finally
If you have comments, questions etc., please comment on this post or [ping][ma] me.
comments powered by Disqus